Reading and updating your data from anywhere
Quick Overview VideoOverview
If you're not familiar with Data Blaze, consider starting with the Quick Start guide.
In this guide, we will be using the following Data Blaze table.
1. Adding row to a table
Getting started
There are two potential ways to to add a row to a table from a snippet:
| In Text Blaze | In Data Blaze |
|---|---|
Add the Insert row into table command to your snippet | Click on Add row to table |
 | 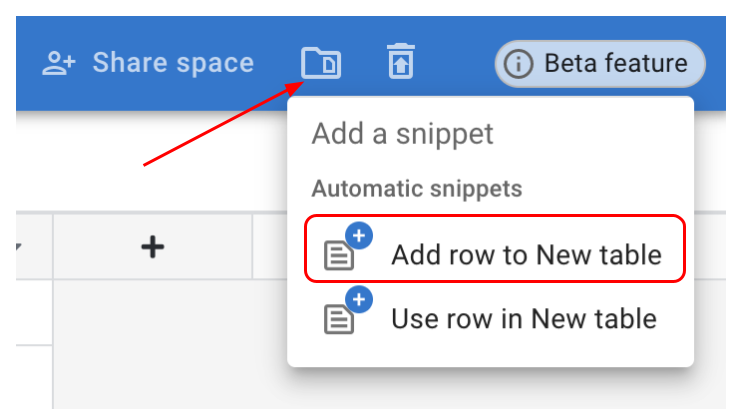 |
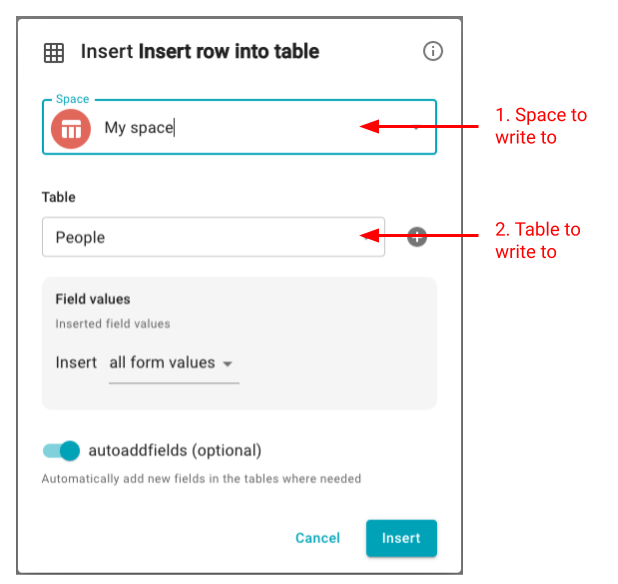
When adding the command to a snippet in Text Blaze, you'll need to specify the space and table.
That's it!
- By default, when inserting the snippet, Text Blaze will create a new row in the table and populate it with the snippet's form fields' values.
- Field name matching - Form fields that match a table field (column) name, will be added to that column.
- If a form field name doesn't match any of the table's fields, a new table field will be created.
Selecting which field values to add
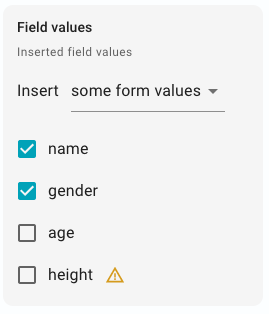
You can chose which form values to insert by changing the Field values configuration from all form values to some form values and choosing which fields to insert.
Form fields that are in the snippet but don't correspond to table columns will be highlighted.
Automatically adding fields
By default, form fields that don't correspond to table columns will be added as new columns to the table. To prevent that, set the autoaddfields setting to No.
When the setting is
No, form fields that don't correspond to table columns will not be written to the table.
2. Reading data from a table
Getting started
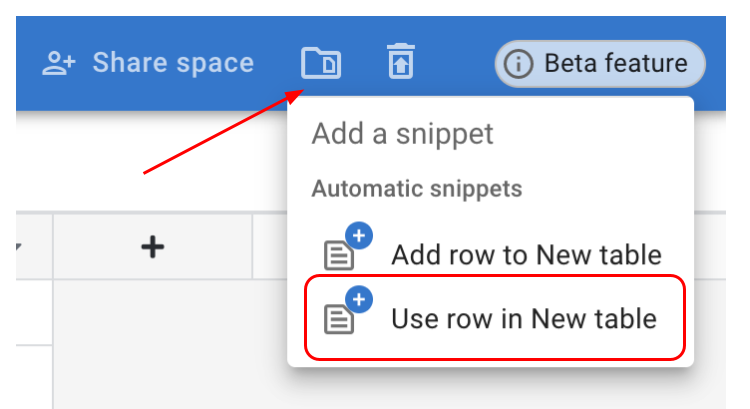
There are two ways to create a snippet that reads data from a table:
| In Text Blaze | In Data Blaze |
|---|---|
Add the Read from table command to your snippet | Click on Use row in table |
 |  |
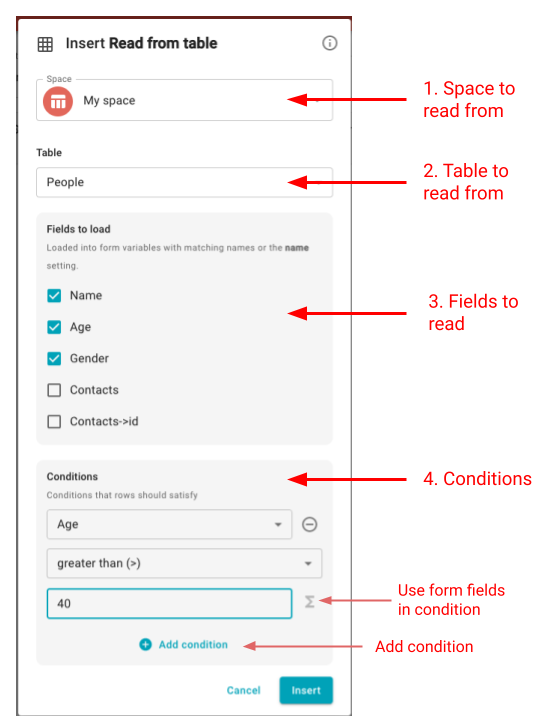
Selecting what data to read
When reading from a table the following needs to be specified:
- The Space to read from
- The table in the space to read from
- Fields to read
- Row(s) to read by specifying the condition(s) they must satisfy.
When using Use row in table from Data Blaze all the above are preset and can be modified by clicking on the command
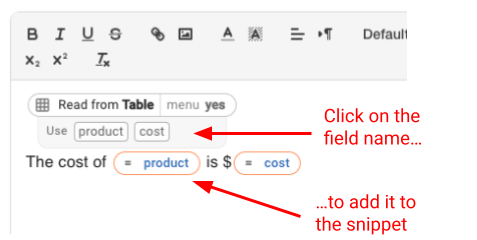
Using the data in a snippet
The Read from table command will present the fields being read. Click on any field to add it to the snippet.
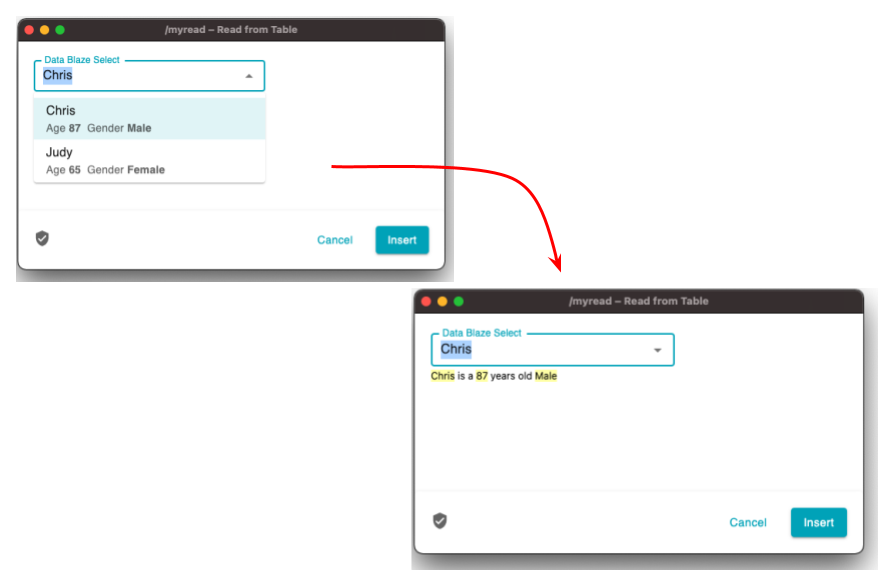
Selecting which row to use
When the menu setting is Yes (the default state), when inserting the snippet, a window will pop-up with a menu of all the rows that satisfy the conditions. Select one of the rows and the field values will be populated accordingly.
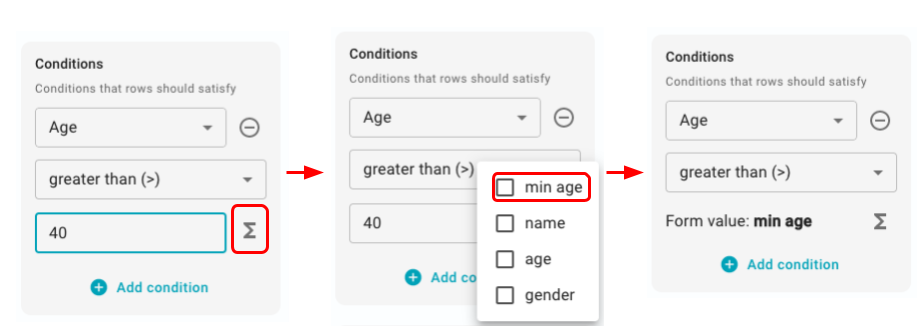
Dynamic conditions
Snippet form fields can be used in conditions to make them dynamic:
- Click on the
Read from tablecommand to show its settings. - Add a condition or edit an existing condition.
- Click on the
Form valueicon and select the form field.
Reading multiple rows
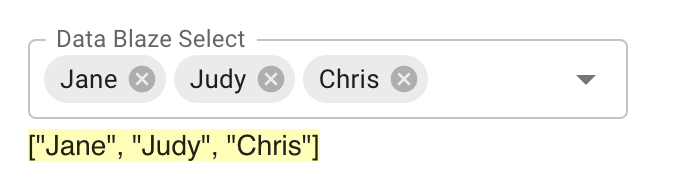
By default, only one row is read. You can read multiple rows at once by changing the Multiple setting to Yes.
When ,multiple is set to Yes, you'll be able to select multiple rows in the table.
Field values will now be stored as a list. The can be accessed using their index, e.g., {=name[1]}. You can read more about working with lists here.
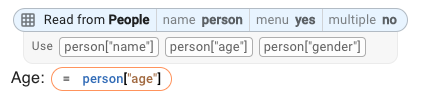
The Name setting
The setting is off by default. Giving the Read from table command a name, places the results in a namespace.
When reading one row, fields can be accessed through name["field name"]. For example, if Name is set to "person", age can be accessed as person["age"].
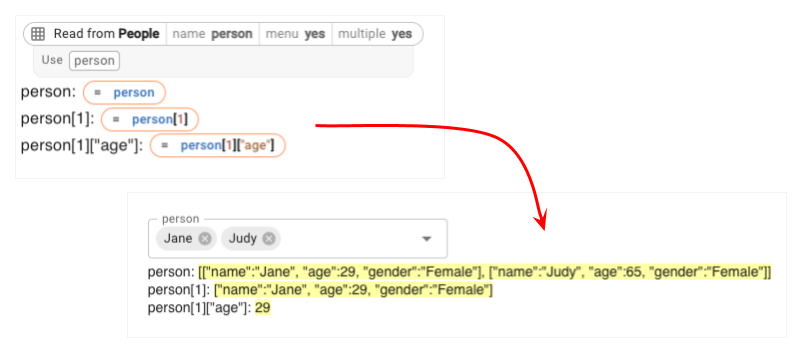
When reading multiple rows, the result will be a list of lists, each representing one row. Each row can be accessed through its index. For examples, person[1]["age"].
Additional settings
The
Order results bysetting determines the order of rows returned and presented in the selection menu. Select a field to order by and whether to order ascending (small to large) or descending (large to small)Limit number of results todetermines how many rows will be read and presented in the menu. Defaults to 200.Menu(set toYesby default) determines if a menu to select a row will be shown in the pop-up. If set toNothe first row(s) that satisfy the conditions will be automatically selected.Defaultsets the field value while data is being loaded. e.g., "name"="customer" will set the form field {=name} tocustomeruntil a row is selected.Isloadingcreates a field that will be set toyeswhile the data is loading andnowhen it's done loading. E.g., if the field name is set to "loading". the form field {=loading} will be set toyeswhile the data is loading andnowhen it's done loading: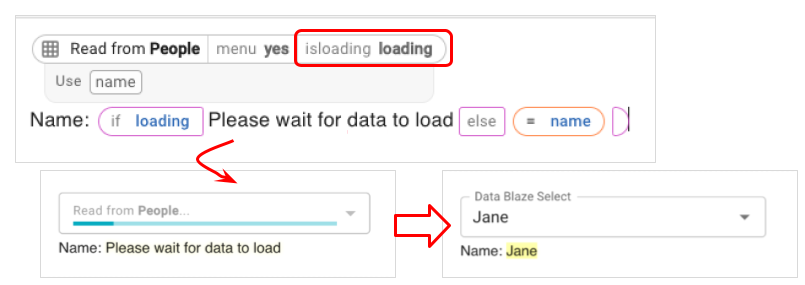
Haserrorwill be set toyesif there's an error loading data e.g. is the field name is set to "error", the value of the form field {=error} will be set toyesif there's an error and tonootherwise.
Advanced queries
Read from table supports bespoke queries using the BSQL querying language. See the BSQL reference for details.
3. Updating a row
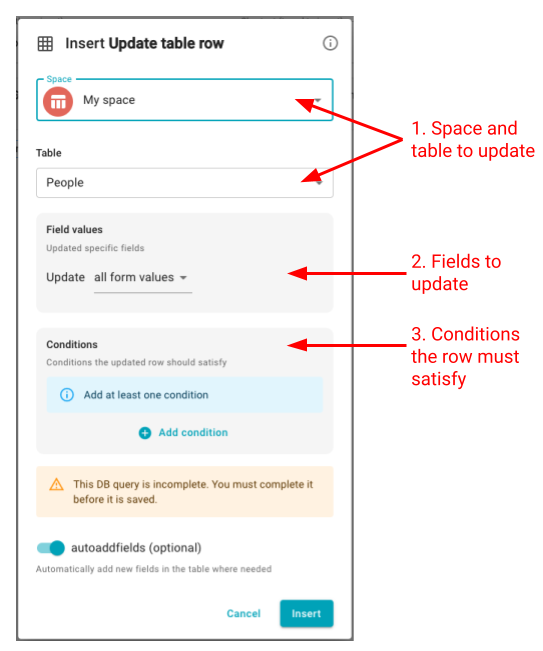
To update a row, add the Update row command and:
- Define the table to update.
- Create one or more form fields that match table columns.
- Define a set of one or more conditions that define one (and only one) row.
If more than one row satisfy the conditions, the update won't work.
That's it!
- When inserting the snippet the selected row will be updated with the selected form fields.
- Field name matching - Table columns that match snippet form fields name, will be updated accordingly.
- If a form field name doesn't match any of the table's fields, a new table field will be created.
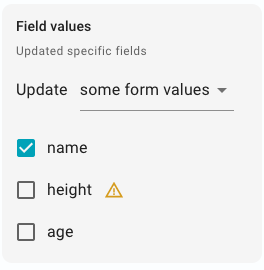
Selecting which field values to update
You can chose which form values to update by changing the Field values configuration from all form values to some form values and then selecting which fields to update.
Form fields that are in the snippet but don't corresponding to table columns will be highlighted
Automatically adding fields
By default, form fields that don't correspond to table columns will be added as new columns to the table. To prevent that, set the autoaddfields setting to No.
When the setting is
No, form fields that don't correspond to table columns will not be added to the table.
4. Deleting a row
Deleting only requires setting the conditions that the deleted row must satisfy. You can only delete one row at a time - only one row should satisfy the conditions.
Be careful! Make sure that deleting rows programmatically is the right thing for you.
[Advanced] Link to table fields
Link to table fields are table fields that link to a row in a different table.
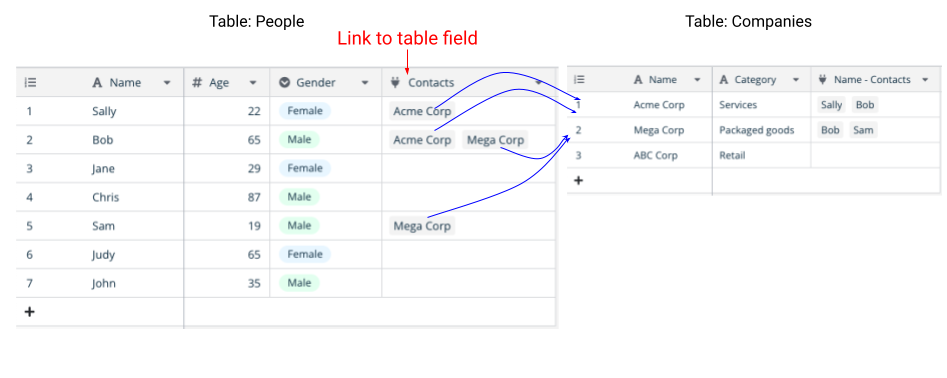
Reading a linked fields
If one of the fields in your table is a Link to table field, the value read is the same one shown in the table UI (the primary field of the linked row). E.g. the value of {=contacts} will be ACME Corp
You also have the option to read the row id. This will return a list of the linked row ids (list because there can be more than one).
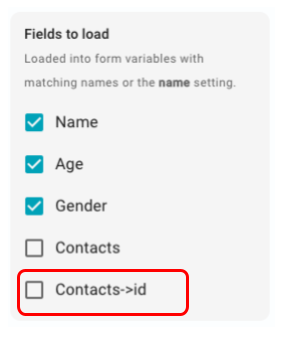
Row ids are unique identifiers of the table rows. They are different from the row number in the UI, which can change based on sorting or filtering. For example, {=`contacts->id`} may be equal to ["3XKJDqJ9v76ylfWEOayzNZ", "1utolLwgjtcD7G4pdi5376"]
Reading additional fields from the linked row
If you'd like to read additional fields from the linked table, you can do that it two ways:
- [Recommended] Add these fields to the table as Lookup fields and read them as well.
- [Advanced] Read the field's row id and use it in a separate
Read from tablecommand as the condition. See the BSQL reference for details.
Adding or updating Link to table fields
To add or update the value of a Link to table field, the snippet form field needs to contain a list of the linked row ID(s). E.g., {contacts=["3XKJDqJ9v76ylfWEOayzNZ", "1utolLwgjtcD7G4pdi5376"]}