Webhooks
Overview
Webhooks enable real-time notifications to third-party systems whenever rows in Data Blaze are created, updated, or deleted, ensuring you stay informed about all changes in your tables.
By configuring webhooks, you can automate notifications for specific table actions, which enhances data management and optimizes workflows
Creating a webhook
In the following section, we will walk through the process of creating a webhook in Data Blaze.
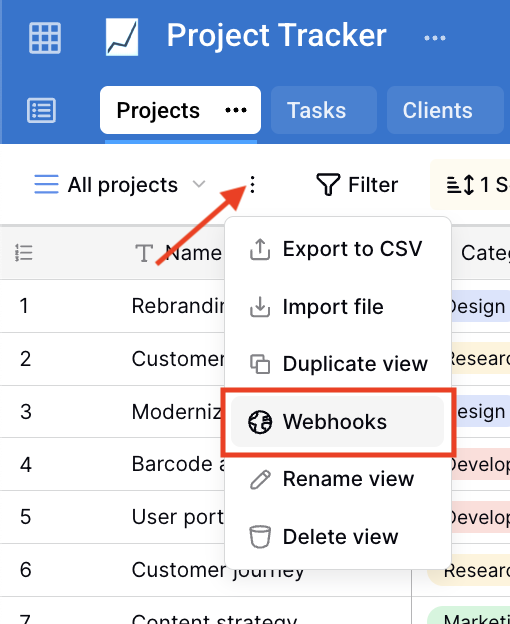
Open the table for which you want to create a webhook for.
Click on the three dots next to the view name, and then click the "Webhooks" menu item.
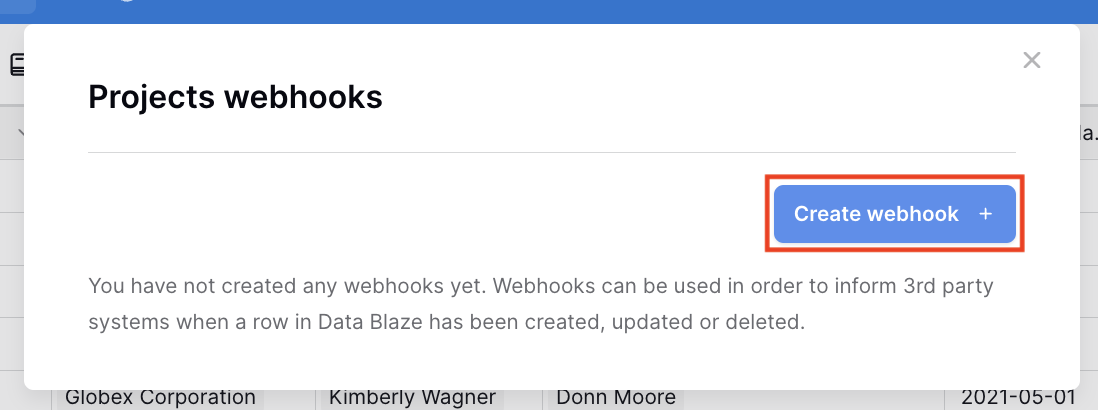
In the webhooks dialog, click the "Create webhook" button.
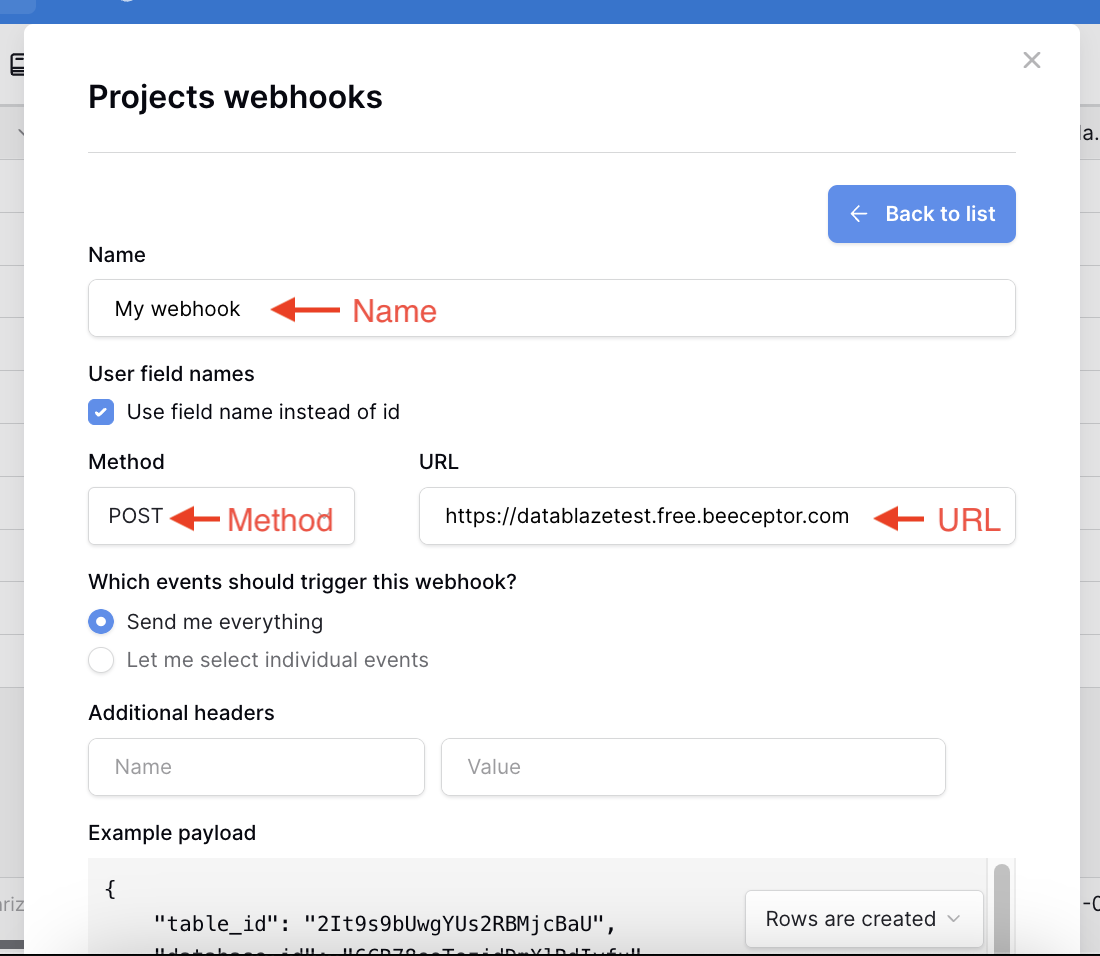
Enter a name for the webhook, the URL to be called when the webhook is triggered, and the method for your webhook (e.g., GET, POST, etc.).
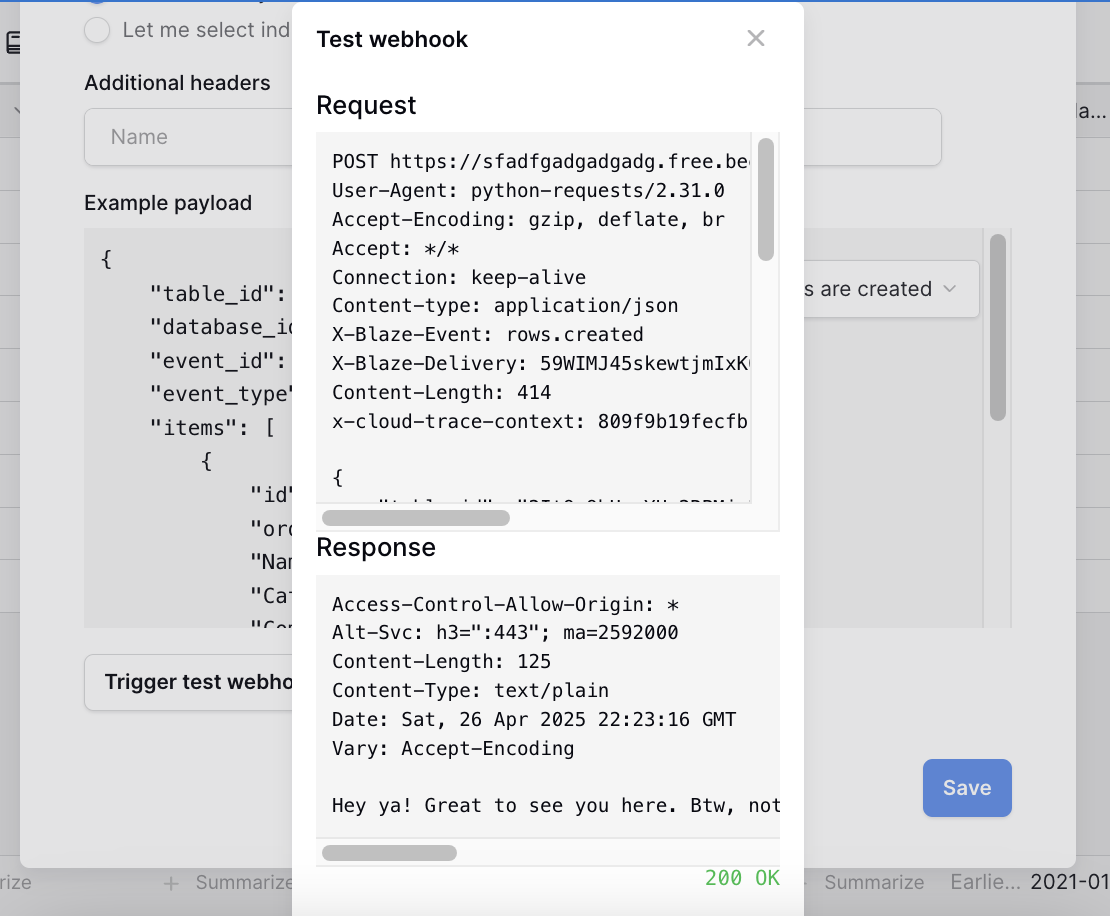
Scroll to the bottom of the dialog and then click the "Trigger test webhook" button.

Check your backend service to verify that the webhook was triggered successfully.
Configuring a webhook
When setting up a webhook, you’ll define a set of attributes that determine how it behaves.
| Attribute | Description |
|---|---|
| Name | The display name of the webhook used in your table's webhooks list. |
| User field names | If the "Use field name instead of id" checkbox is selected, field names will be used in the webhook (e.g. "Customer name"). Otherwise, field IDs will be used (e.g. "field_2CSNWJKgm3gJMzbH2ovcJy"). |
| Method | The HTTP method to use when calling the webhook's URL. Available methods are: GET, POST, PATCH, PUT, and DELETE. |
| URL | The URL to be called when the webhook is triggered. |
| Which events should trigger this webhook | If "Send me everything" is chosen, the webhook will be triggered for all table events. Choosing "Let me select individual events" allows you to pick specific events. |
| Additional headers | Custom headers to include when sending the webhook request. |
Webhook events
Webhook events send real-time updates whenever a particular action happens in a table, allowing your external systems to react immediately to changes and eliminating the need for manual monitoring or polling for changes. The system automatically sends new information as soon as an event occurs.
When the "Send me everything" option is selected, the webhook will be triggered for all table events. On the other hand, when the "Let me select individual events" option is selected, you can choose which events should trigger the webhook.
The following list describes the available events:
| # | Event | Description |
|---|---|---|
| 1 | Rows are created | Triggered when a row is created in your table. |
| 2 | Rows are updated | Triggered when a row is updated in your table. |
| 3 | Rows are deleted | Triggered when a row is deleted in your table. |
| 4 | Field is created | Triggered when a field is created in your table. |
| 5 | Field is updated | Triggered when a field is updated in your table. |
| 6 | Field is deleted | Triggered when a field is deleted in your table. |
| 7 | View is created | Triggered when a view is created in your table. |
| 8 | View is updated | Triggered when a view is updated in your table. |
| 9 | View is deleted | Triggered when a view is deleted in your table. |
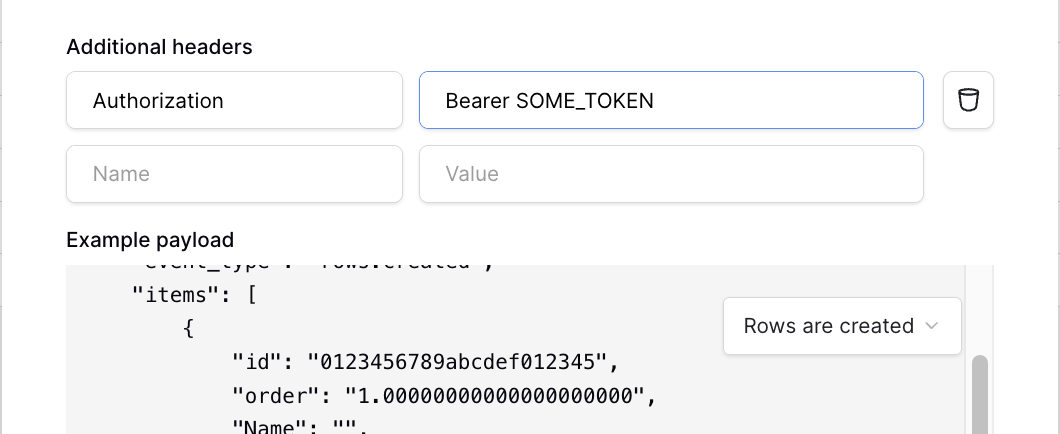
Additional headers
Additional headers are key-value pairs that will be included in the headers section of the request. One common use case for additional headers is to include an authorization token for your webhook URL to verify the identity of the caller.
Webhook Payload
Whenever a webhook event occurs, a payload is delivered to the specified URL you have set up. The following shows an example of the structure used in a webhook payload for a “Rows Created” event:
{
    "table_id": "8Vf4p7cXnzKJr5MTLhdWqP",
    "database_id": "3QM19syEvxFbWgVzKptNdA",
    "event_id": "f1e2d3c4b5a69788776655",
    "event_type": "rows.created",
    "items": [
        {
            "id": "9a8b7c6d5e4f33221100ff",
            "order": "1.00000000000000000000",
            "Name": "",
            "Category": null,
            "Completed": false,
            "Client": [],
            "Project lead": [],
            "Project team": [],
            "Kickoff date": null,
            "Due date": null,
            "Notes": "",
            "Tasks": [],
            "Budget": null
        }
    ]
}
Editing and deleting webhooks
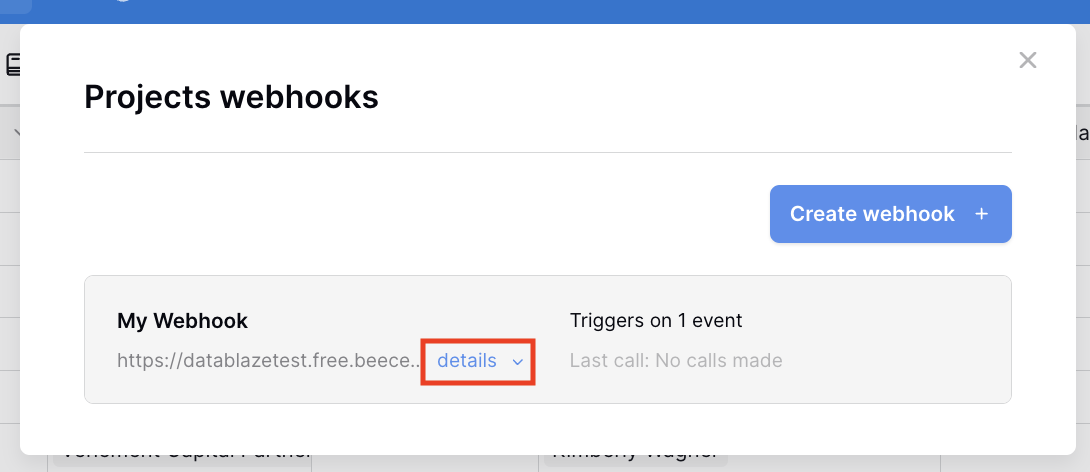
- Open the webhooks list for the table you want to edit.
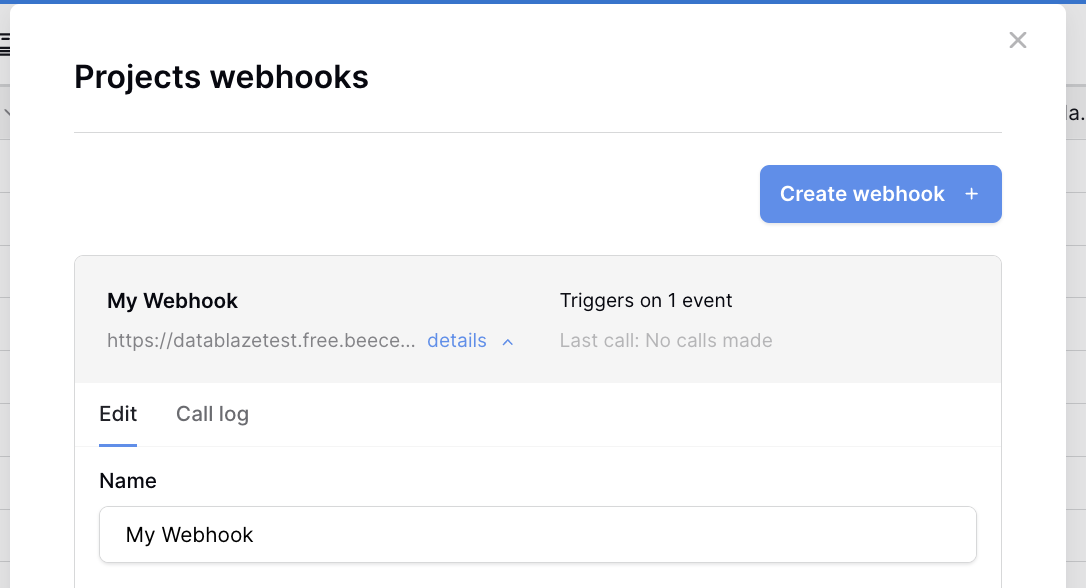
- Click the "details" link below the webhook name in the webhooks list.
- You may now change any of the webhook attributes.
- Scroll to the bottom of the dialog and then click the "Save" button.
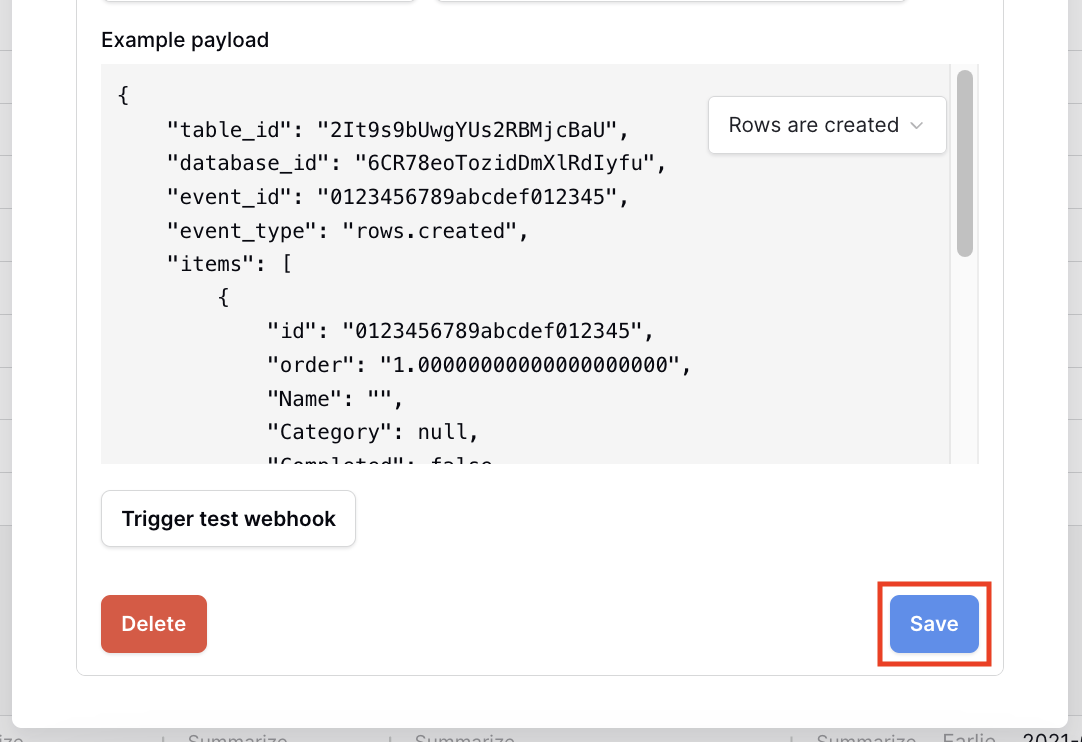
- You can also click the "Delete" button to remove the webhook from that table.
Call log
Each webhook provides access to both the request and the response data. This is particularly helpful for debugging, especially when a call fails and you need to inspect the details of the interaction to determine the cause.
To access a webhook call log:
- Open the webhooks list for the table you want to edit.
- Click the "details" link below the webhook name in the webhooks list.
- Click the "Call log" tab.
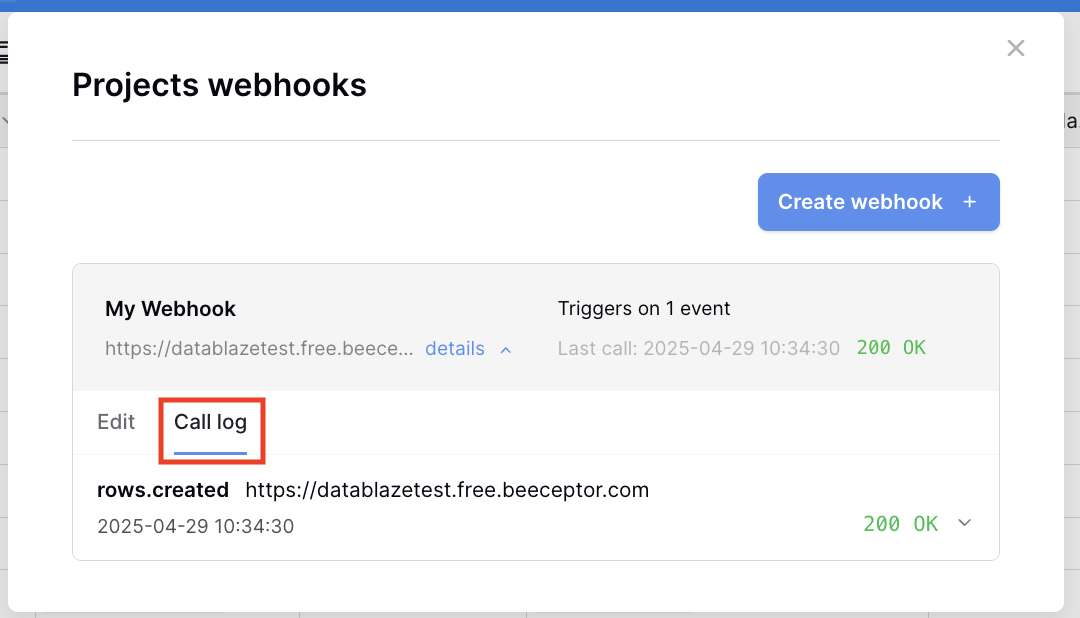
- You may now inspect the webhook call log.